No pictures for this recipe folks - it wasn't quite pretty enough. That, and I was lazy by the time I got home at 8pm.
The original recipe came from a recent Taste of Home magazine I received in the mail. There are always so many recipes I want to try in each issue, but then they get tossed into a pile and lost. I forget. Time moves on. But . . . this time I was determined to try one out, and that's just what this gal did.
Turkey Mushroom Stroganoff
Adapted from Taste of Home's Chicken Portobello Stroganoff
20 oz. ground turkey (Why? Because my grocery store didn't package it in 16 oz. sizes, which I found uber strange. A pound would be just fine too as that's what the original recipe used.)
12 oz. button mushrooms, cut into large chunks
1 medium onion
1 tsp. jarred garlic (the equivalent of 2 cloves)
1 c. chicken broth (I made mine with warm water & chicken bouillon)
1/2 c. heavy whipping cream
Salt and pepper, to taste
8 oz. light sour cream
Hot cooked egg noodles or pasta
In a large skillet, cook the turkey, mushrooms and onions over medium-high heat until the meat is no longer pink. Add the garlic and cook a minute or so longer.
Bring the mixture to a boil. Because of the moisture from the veggies, I had quite a bit of liquid in my pan. Cook until that's mostly evaporated. Add the broth, cream, salt and pepper. Bring to a boil; cook until the liquid in the pan is reduced to half or so. This took longer that I thought it would, but I forgot to time it. Just eyeball it!
Reduce the heat and stir in the sour cream. You want it to heat through once the sour cream is added, but not boil so the sour cream curdles. On my stove, I had to turn the heat completely off because it wanted to continue to boil. Work with it and see what happens - if it continues to want to bubble, just take it off the burner. Serve with the noodles or pasta, or eat as is if you're low-carbing life as I am right now. I didn't miss them at all, but I'm not a pasta/rice/noodle kind o' person. Yes, I just admitted that. Please don't throw things at me.
The verdict? Well, I don't post recipes I don't like. My thought though - it was a little bland. Buppy liked it and said that it's what stroganoff is supposed to taste like, so I guess I aced that. To be honest, I've never had stroganoff before so I had no idea what to expect. I guess I just like a little more spice in my life! Buppy liked the fact that it used ground meat; he said that if you order it at a restaurant, they often use tough cuts of meat, so this was much easier to eat. If you like stroganoff, give it a try. I don't think you'll be disappointed. Oh, and I had the leftovers for lunch today at work. I'm happy to say it reheats well. Enjoy!
Linked to Miz Helen's Country Cottage Full Plate Thursday, 4/5/12.
Showing posts with label main dish. Show all posts
Showing posts with label main dish. Show all posts
Thursday, April 5, 2012

Monday, October 10, 2011
Slow-Cooker Brisket Sammies
It all started with this recipe for slow-cooker brisket sandwiches. And for the record, I took a picture, but it was ugly and icky and not post-worthy. I digress.
I took the time last night to prep my marinade and sear the brisket for tonight's dinner so I could quickly throw it all together this morning before heading out the door for work. I was excited; things smelled great.
I called Buppy on my way to the gym to ask if he had tried it and find out how the house smelled. Word was that the house smelled fab and the brisket was yummy. It didn't hold together to slice, but heck, I can deal with shredded meat!
Then I arrived home . . . to disappointment. Well, Buppy had just sprayed down and wiped off the dinner table, so I couldn't smell the meat, just a lemony-piney-clean odor. Ok, fine, whatever; I can deal with that, too.
Then I tried a bite. Most of you dear readers would probably like this meat, but for me, it was way too sweet. Anyone who knows me knows I don't care for sweet meat at all, which means we almost never eat BBQ sauce (at least I don't). I should have known - the recipe called for tomato paste (I had to use sauce as I thought I had paste but turns out I was wrong) and brown sugar. Couple that with some Dijon mustard and red wine vinegar and you've got one overly sweet brisket folks!
Buppy liked it, and Tiny Tot #1 devoured his (so I'm told, I wasn't home to witness this). He ate almost all of it before touching his homemade fries! What I'm trying to say is that if you're a regular Joe and enjoy your BBQ, give this a try and you will probably enjoy it. Make sure to get some nice crusty rolls to pair with it - they were the saving grace for me. Thanks for picking up the rolls, Buppy! Also, I topped mine with dill pickle chips for some acidity in hopes of cutting the sweetness. It helped a little.
Now go, enjoy your sweet brisket. Me? I'm off to find a savory dry rub for my next go-round.
I took the time last night to prep my marinade and sear the brisket for tonight's dinner so I could quickly throw it all together this morning before heading out the door for work. I was excited; things smelled great.
I called Buppy on my way to the gym to ask if he had tried it and find out how the house smelled. Word was that the house smelled fab and the brisket was yummy. It didn't hold together to slice, but heck, I can deal with shredded meat!
Then I arrived home . . . to disappointment. Well, Buppy had just sprayed down and wiped off the dinner table, so I couldn't smell the meat, just a lemony-piney-clean odor. Ok, fine, whatever; I can deal with that, too.
Then I tried a bite. Most of you dear readers would probably like this meat, but for me, it was way too sweet. Anyone who knows me knows I don't care for sweet meat at all, which means we almost never eat BBQ sauce (at least I don't). I should have known - the recipe called for tomato paste (I had to use sauce as I thought I had paste but turns out I was wrong) and brown sugar. Couple that with some Dijon mustard and red wine vinegar and you've got one overly sweet brisket folks!
Buppy liked it, and Tiny Tot #1 devoured his (so I'm told, I wasn't home to witness this). He ate almost all of it before touching his homemade fries! What I'm trying to say is that if you're a regular Joe and enjoy your BBQ, give this a try and you will probably enjoy it. Make sure to get some nice crusty rolls to pair with it - they were the saving grace for me. Thanks for picking up the rolls, Buppy! Also, I topped mine with dill pickle chips for some acidity in hopes of cutting the sweetness. It helped a little.
Now go, enjoy your sweet brisket. Me? I'm off to find a savory dry rub for my next go-round.
Monday, August 15, 2011
Crab Cakes - Absolutely Delish!

Crab Cakes
Slightly adapted from from the recipe on the Old Bay can
2 slices bread, crusts removed
2 Tbsp. mayonnaise
2 tsp. Old Bay seasoning
1/2 tsp. prepared yellow mustard
1 egg, beaten
1 lb. lump crab meat
Tear bread into small pieces. Mix in mayonnaise, Old Bay, mustard and egg. Stir in crab meat. Shape mixture into 4 equal-sized patties. Broil 10 minutes on low, then another 2 on high for the broiled version. To shallow pan-fry them, heat approximately 1 inch of canola oil in a skillet. Once hot, add patties to the pan and fry for approximately 3-4 minutes per side or until golden brown. Remove to a plate lined with a paper towel to drain. Enjoy alone or with cocktail or tartar sauce. I recommend alone.
Buppy prefered the fried version, while I'm torn between the two. The broiled version I think would win for me, except that I should have flattened it a bit more so the bready-mixture would have cooked just a tad more. We both agree that next time we'd use either 2 1/2 or 3 tsp Old Bay simply because we both love the seasoning.
While this wasn't an inexpensive meal by any stretch of the imagination, 4 crab cakes for basically the price of 1 lb. of lump crab meat was a steal compared to what we would have paid in any restaurant. Plus, they were better than quite a few I've tasted in restaurants, so it's a win-win. Enjoy!


One of the broiled cakes. Look at that lump crab meat and crispy top.
Note: this post is linked up to Miz Helen’s Country Cottage for her Full Plate Thursday, 8/18/11 edition. Hope you all enjoy!
Saturday, May 14, 2011
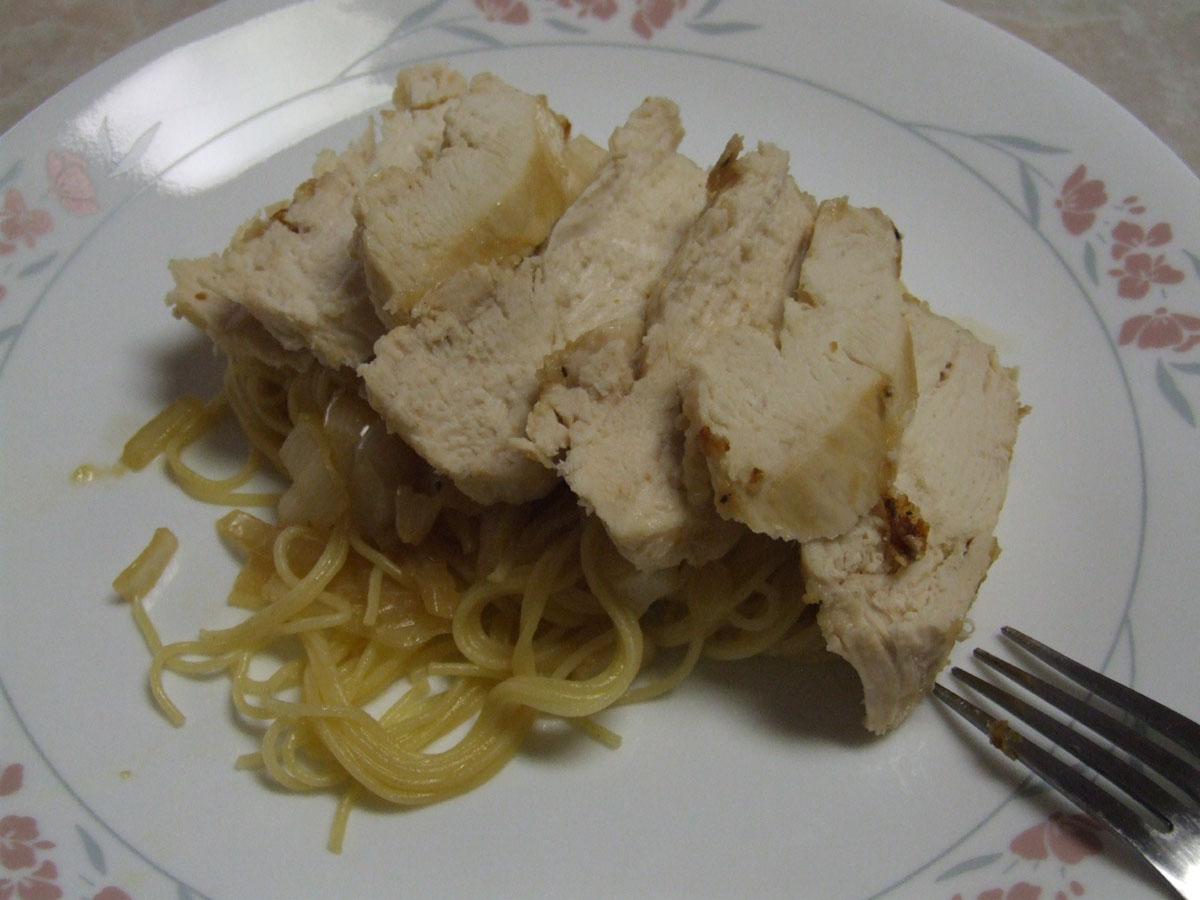
Chicken with Lemon-Onion Pasta
I recently snagged a copy of Cooking Light magazine from the library with the intention of reading it on my lunch break at work. Truth be told, I generally work through my lunch (my anal retentiveness and all with trying to catch up on old projects), but I managed to skim it here at home.
There are several great-looking recipes I want to try, and I already have almost all the ingredients on hand. Bonus! This is one we had for dinner earlier this week, and we both really enjoyed how light it was.
Chicken with Lemon-Onion Pasta
Adapted from Cooking Light, Oct. 2010, p. 96
2 lg. boneless, skinless chicken breasts
Salt and pepper, to taste
1/4 c. (+/-) all-purpose flour
3 Tbsp. butter, divided
1 1/2 tsp. jarred minced garlic
1/4 lg. onion, chopped
1/2 water
1 chicken bouillon cube (I prefer soup base, but this was all I had on hand)
2 Tbsp. lemon juice (I used bottled with great results)
Hot cooked pasta (I like angel hair)
Cook pasta according to directions, omitting salt & fat. Drain and keep warm.
Place chicken breasts between 2 sheets of heavy-duty plastic wrap or in a large, sturdy ziplock bag. Pound flat with a heavy skillet or meat mallet.
Place flour in a shallow dish and season with salt and pepper. Dredge chicken in the flour mixture, shaking to remove excess.
Heat 1Tbsp. butter in a large, non-stick skillet over medium-high heat. Add chicken; cook 3 (+/-) minutes on each side or until done. Remove from pan and keep warm.
Melt another tablespoon of butter in the same skillet over medium-high heat. Add garlic, onion and a light sprinkle of salt; saute 4 minutes. Add water, bouillon cube and lemon juice; cook 4 minutes or until liquid is reduced by half. Remove from heat and stir in the remaining 1 Tbsp. butter. Add the pasta to the onion mixture; toss well to combine. Serve chicken over the pasta mixture.
Ok, so I definitely deviated from the original recipe. It called for leeks instead of onions, but I forgot to pick some up at the produce market and refused to pay $2.99 for 2-3 of them at the regular grocery store. Besides, anything from the garlic/onion family makes me happy, so I subbed the onion in with no problem. Also, I was lazy and didn't pound out the chicken breasts. I deeply regretted this early on when I realized that I'd have to add water to the chicken pan and cover to steam the breasts because they just weren't going to cook through without burning the outside. A nice crust formed on the outside, but I lost that when I added the water. It would have been even crazier-tasty with the crust still intact, so I don't recommend skipping the pound-out stage. Also, the original called for 4 breasts, 6 ounces each. I used 2 very large breasts, which could have easily been enough for 4 people had I pounded them out. Actually, I ate about half of the breast I'd made for myself and Buppy had the rest of mine for lunch with the leftover pasta the next day.
This recipe was pretty simple to make, and I loved how 'Spring-y' it tasted. Light and fresh from the lemon juice, and the sauce was barely there. Enough to lend flavor to the pasta, which we both thought would be bland, but it wasn't a heavy sauce that weighed me down after I was done. Next time, I think I might add some artichoke hearts when I start sauteing the onions. How delicious does that sound? Enjoy!
Sorry about the picture quality. I have my new fancy-schmancy camera but have yet to figure out exactly what type of lighting I need for the best quality shots. I'm working on it though!

There are several great-looking recipes I want to try, and I already have almost all the ingredients on hand. Bonus! This is one we had for dinner earlier this week, and we both really enjoyed how light it was.
Chicken with Lemon-Onion Pasta
Adapted from Cooking Light, Oct. 2010, p. 96
2 lg. boneless, skinless chicken breasts
Salt and pepper, to taste
1/4 c. (+/-) all-purpose flour
3 Tbsp. butter, divided
1 1/2 tsp. jarred minced garlic
1/4 lg. onion, chopped
1/2 water
1 chicken bouillon cube (I prefer soup base, but this was all I had on hand)
2 Tbsp. lemon juice (I used bottled with great results)
Hot cooked pasta (I like angel hair)
Cook pasta according to directions, omitting salt & fat. Drain and keep warm.
Place chicken breasts between 2 sheets of heavy-duty plastic wrap or in a large, sturdy ziplock bag. Pound flat with a heavy skillet or meat mallet.
Place flour in a shallow dish and season with salt and pepper. Dredge chicken in the flour mixture, shaking to remove excess.
Heat 1Tbsp. butter in a large, non-stick skillet over medium-high heat. Add chicken; cook 3 (+/-) minutes on each side or until done. Remove from pan and keep warm.
Melt another tablespoon of butter in the same skillet over medium-high heat. Add garlic, onion and a light sprinkle of salt; saute 4 minutes. Add water, bouillon cube and lemon juice; cook 4 minutes or until liquid is reduced by half. Remove from heat and stir in the remaining 1 Tbsp. butter. Add the pasta to the onion mixture; toss well to combine. Serve chicken over the pasta mixture.
Ok, so I definitely deviated from the original recipe. It called for leeks instead of onions, but I forgot to pick some up at the produce market and refused to pay $2.99 for 2-3 of them at the regular grocery store. Besides, anything from the garlic/onion family makes me happy, so I subbed the onion in with no problem. Also, I was lazy and didn't pound out the chicken breasts. I deeply regretted this early on when I realized that I'd have to add water to the chicken pan and cover to steam the breasts because they just weren't going to cook through without burning the outside. A nice crust formed on the outside, but I lost that when I added the water. It would have been even crazier-tasty with the crust still intact, so I don't recommend skipping the pound-out stage. Also, the original called for 4 breasts, 6 ounces each. I used 2 very large breasts, which could have easily been enough for 4 people had I pounded them out. Actually, I ate about half of the breast I'd made for myself and Buppy had the rest of mine for lunch with the leftover pasta the next day.
This recipe was pretty simple to make, and I loved how 'Spring-y' it tasted. Light and fresh from the lemon juice, and the sauce was barely there. Enough to lend flavor to the pasta, which we both thought would be bland, but it wasn't a heavy sauce that weighed me down after I was done. Next time, I think I might add some artichoke hearts when I start sauteing the onions. How delicious does that sound? Enjoy!
Sorry about the picture quality. I have my new fancy-schmancy camera but have yet to figure out exactly what type of lighting I need for the best quality shots. I'm working on it though!
Friday, April 8, 2011
Personal-Sized Calzones
Last Monday night's dinner was supposed to be a pizza braid, but that morphed into personal calzones since I was working with sticky dough and wasn't sure I could pull off the cuts and braiding. No worries, mate, it was still a tasty meal, and the best part was being able to personalize the fillings in each one. Tiny Tot #1 wanted cheese only, Tiny Tot #2 wanted pepperoni and cheese, and Buppy and I each had sausage, pepperoni, mushrooms, sauteed onions, black and green olives and cheese. Lets just say the kids' calzones were much easier to seal than the adult ones.
 The hardest part (if you can call it that) about this recipe is sealing the edges of each calzone. The dough didn't really want to cooperate, but I showed it who's boss, and only a little cheese managed to escape from one of the lesser-filled ones.
I used this pizza crust recipe made in my bread machine (does it get any easier?) to start with. Once it was done, I plopped out the dough, kneaded it a little (with oiled hands because it was sticky), then divided it into 4 equal portions. I rolled each portion out as best I could to look like a little mini pizza, then topped with sauce, each person's requested fillings and cheese. For a calzone, you basically just fill up half the mini pizza with your toppings/cheese, fold the empty half over and do your best to seal the edges. Hence Tiny Tot #2 calling dinner 'pizza folded over'. I did the 2 for the kids first, and while they were baking made mine and Buppy's. I made sure to poke a few holes in the first batch to allow some steam to escape, but that was unneccessary in the bigger ones because I tore the dough a bit. I'm gonna say I did it on purpose so I wouldn't have to go through the hassle of poking the holes. Believe what you want.
 The first pan (which had 2 calzones on it) baked for 15 minutes. They were just slightly undercooked when we cut them in half, so we let the larger ones on the 2nd pan bake for 17 minutes; they were perfect.
Give calzones a try sometime. They're a nice twist on the original pizza and could easily be stuffed with whatever you want. Be careful with super wet ingredients though, because if too much water cooks out of something (i.e. raw veggies), your dough will get soggy. I suggest sauteeing fresh veggies before cramming 'em in.
Lastly, to those of you who have asked about finding inexpensive bread machines --- there were 3 at my local Goodwill last time I checked (2 weeks or so ago). Good luck finding one in your area!
*Linked to Miz Helen’s Country Cottage Full Plate Thursday, 4/28/11.

I used this pizza crust recipe made in my bread machine (does it get any easier?) to start with. Once it was done, I plopped out the dough, kneaded it a little (with oiled hands because it was sticky), then divided it into 4 equal portions. I rolled each portion out as best I could to look like a little mini pizza, then topped with sauce, each person's requested fillings and cheese. For a calzone, you basically just fill up half the mini pizza with your toppings/cheese, fold the empty half over and do your best to seal the edges. Hence Tiny Tot #2 calling dinner 'pizza folded over'. I did the 2 for the kids first, and while they were baking made mine and Buppy's. I made sure to poke a few holes in the first batch to allow some steam to escape, but that was unneccessary in the bigger ones because I tore the dough a bit. I'm gonna say I did it on purpose so I wouldn't have to go through the hassle of poking the holes. Believe what you want.

Give calzones a try sometime. They're a nice twist on the original pizza and could easily be stuffed with whatever you want. Be careful with super wet ingredients though, because if too much water cooks out of something (i.e. raw veggies), your dough will get soggy. I suggest sauteeing fresh veggies before cramming 'em in.
Lastly, to those of you who have asked about finding inexpensive bread machines --- there were 3 at my local Goodwill last time I checked (2 weeks or so ago). Good luck finding one in your area!
*Linked to Miz Helen’s Country Cottage Full Plate Thursday, 4/28/11.
Wednesday, March 30, 2011
Experimenting with Philly Cooking Creme
Last week, I decided to experiment with some Philadelphia Cooking Creme. Kraft First Taste sent me 2 coupons for the stuff, one for a free container and one for $1.50 off another container. I found them on sale for $2.50 each at a local grocery store, so I basically paid 50 cents for each one.
I decided I wanted to do a chicken, veggie and pasta dish, so I started off by roasting up some fresh broccoli, cauliflower, mushrooms and celery. The veggies were tossed in EVOO and seasoned lightly with some Mrs. Dash Herb and Garlic seasoning. I roasted everything at 425F for about 10 minutes.
For the chicken, I pounded out 2 boneless, skinless breasts and cut them into slices. I put 2 spoonfuls of flour into a plastic bag, seasoned it with garlic salt, black pepper and dried basil and added the chicken . . . then I shook it all around. I did the Hokey-Pokey . . . Oh wait, back to the chicken. I poured a tablespoon of canola oil (give or take) into a skillet and heated it on medium-high. I cooked the chicken in 2 batches (adding more oil as necessary) and removed to a plate (with a paper towel on it to absorb any excess oil).
I cooked up about 3/4 of a box of penne rigate per the instructions on the box, then combined the chicken, roasted veggies and pasta in a large skillet. I added 3/4 of the container of Italian Herb cooking creme, stirred it all together and heated through over medium heat until everything was warmed. Note: the pasta was cooked extra al dente because I knew it would continue to cook while I heated the mixture in the skillet. I added a little stock to the pan with the cooking creme, just because I wanted to thin the mixture out a little.
 Overall, this was a tasty meal. I don't think I'll purchase any more of the cooking creme though. The convenience was nice, but the calorie count isn't great. Plus, I'm confident I can make similar sauces from scratch ingredients. I might change my mind when I taste the Savory Garlic one we still have unopened in the fridge, or when I go back to work and learn to again appreciate ingredients that make speedy dinners an option.
Thanks again to Kraft First Taste for allowing me to give it a try for free!
I decided I wanted to do a chicken, veggie and pasta dish, so I started off by roasting up some fresh broccoli, cauliflower, mushrooms and celery. The veggies were tossed in EVOO and seasoned lightly with some Mrs. Dash Herb and Garlic seasoning. I roasted everything at 425F for about 10 minutes.
For the chicken, I pounded out 2 boneless, skinless breasts and cut them into slices. I put 2 spoonfuls of flour into a plastic bag, seasoned it with garlic salt, black pepper and dried basil and added the chicken . . . then I shook it all around. I did the Hokey-Pokey . . . Oh wait, back to the chicken. I poured a tablespoon of canola oil (give or take) into a skillet and heated it on medium-high. I cooked the chicken in 2 batches (adding more oil as necessary) and removed to a plate (with a paper towel on it to absorb any excess oil).
I cooked up about 3/4 of a box of penne rigate per the instructions on the box, then combined the chicken, roasted veggies and pasta in a large skillet. I added 3/4 of the container of Italian Herb cooking creme, stirred it all together and heated through over medium heat until everything was warmed. Note: the pasta was cooked extra al dente because I knew it would continue to cook while I heated the mixture in the skillet. I added a little stock to the pan with the cooking creme, just because I wanted to thin the mixture out a little.

Thanks again to Kraft First Taste for allowing me to give it a try for free!
Tuesday, March 29, 2011
Oven-Fried Whiting Fillets
I wasn't excited for this meal. When I opened the frozen package of whiting fillets to pull a few out to thaw, they smelled fishy. I contemplated skipping this meal, leaving the fish in the fridge long enough to go bad, then throwing it out. We even went out to eat on Friday night to avoid this one. But Saturday night rolled around and I made myself cook the fillets. Surprise! They were actually pretty good and didn't taste fishy at all. Silly me for being a scaredy-cat!
Crispy Oven-Fried Fish Fillets
Adapted from allrecipes.com
7+/- whiting fillets (skin on is fine, but they need to be boneless)
1/3 c. milk
1/4 c. all-purpose flour
2 c. dry Italian bread crumbs
Cooking spray
Tartar sauce, optional
Preheat the oven to 450F. Place a baking rack on a baking sheet and spray with cooking spray. Rinse fish fillets, then dip into milk. Coat with flour, dip back in the milk, then coat with bread crumbs. Place fillets on the baking rack; spray with cooking spray. Bake 10-15 minutes or until they're done. Serve with tartar sauce if desired.
 While they were good fillets and not fishy, I don't think I'd like them without my homemade tartar sauce. Something about the breadcrumbs. The original recipe called for crushed up croutons, not breadcrumbs, but I used what I had on hand. I think next time I'd try it with croutons or crushed up crackers or potato chips.
Both kids ate the first fillet we put on their plates, and Tiny Tot #1 even asked for a 2nd one. Buppy, Tiny Tot #2 and I all ate the fish with the tartar sauce; Tiny Tot #1 preferred his fish plain even though he said he liked the tartar sauce. I honestly wasn't sure they'd eat the fish because they weren't 'fish sticks', but Buppy and I were very pleasantly surprised. They're generally good eaters, so I guess we shouldn't have been.
There is no recipe per say for the tartar sauce I made because I added everything to taste, but here's what went into it: mayo (I'd like to have used 'light', but all we had open was regular), chopped up dill pickles, lemon juice, seasoned salt, garlic salt, black pepper, pickle juice and dried dill weed. I'm not a fan of restaurant or store-bought tartar sauce because they're made using sweet pickles, which I can't stand. This tartar sauce was good enough to eat by the spoonful (in my humble opinion), but I didn't because of the darn calorie content. It really jazzed up the fish though. I highly suggest making this at least a few hours prior to eating so the flavors can meld and the dill weed can rehydrate. Enjoy!
*This post is linked to Life as Mom’s Ultimate Recipe Swap for Thursday, 5/19/11 --- fish!
Crispy Oven-Fried Fish Fillets
Adapted from allrecipes.com
7+/- whiting fillets (skin on is fine, but they need to be boneless)
1/3 c. milk
1/4 c. all-purpose flour
2 c. dry Italian bread crumbs
Cooking spray
Tartar sauce, optional
Preheat the oven to 450F. Place a baking rack on a baking sheet and spray with cooking spray. Rinse fish fillets, then dip into milk. Coat with flour, dip back in the milk, then coat with bread crumbs. Place fillets on the baking rack; spray with cooking spray. Bake 10-15 minutes or until they're done. Serve with tartar sauce if desired.

Both kids ate the first fillet we put on their plates, and Tiny Tot #1 even asked for a 2nd one. Buppy, Tiny Tot #2 and I all ate the fish with the tartar sauce; Tiny Tot #1 preferred his fish plain even though he said he liked the tartar sauce. I honestly wasn't sure they'd eat the fish because they weren't 'fish sticks', but Buppy and I were very pleasantly surprised. They're generally good eaters, so I guess we shouldn't have been.
There is no recipe per say for the tartar sauce I made because I added everything to taste, but here's what went into it: mayo (I'd like to have used 'light', but all we had open was regular), chopped up dill pickles, lemon juice, seasoned salt, garlic salt, black pepper, pickle juice and dried dill weed. I'm not a fan of restaurant or store-bought tartar sauce because they're made using sweet pickles, which I can't stand. This tartar sauce was good enough to eat by the spoonful (in my humble opinion), but I didn't because of the darn calorie content. It really jazzed up the fish though. I highly suggest making this at least a few hours prior to eating so the flavors can meld and the dill weed can rehydrate. Enjoy!
*This post is linked to Life as Mom’s Ultimate Recipe Swap for Thursday, 5/19/11 --- fish!
Friday, February 18, 2011
Lemon & Dill Salmon with Roasted Veggies
Wednesday night's dinner turned out fantastic. Really, really good. And super simple, too! Prep time was all of 5 minutes give or take, which always makes me happy.
 Lemon-Dill Salmon
Adapted from allrecipes.com
2 (4 oz.) salmon filets
3 Tbsp. butter, melted
2 1/2 Tbsp. lemon juice (yes, bottled is fine)
1 tsp. dried dill weed
1/8 tsp. garlic powder
Salt and pepper, to taste
Roasted veggies (optional side dish)
Preheat oven (or the toaster oven, which is what I used) to 350F. Wash salmon and pat dry. Stir melted butter, lemon juice, dill weed, garlic powder, salt and pepper together. Place salmon on baking tray (or in a baking dish if going into a normal oven) and pour the butter mixture over the filets. Cover the tray/dish with foil and bake for 20 minutes, or until fish flakes easily with a fork. Move salmon to plates or a serving platter.
If serving with roasted veggies as we did (or steamed or grilled, if you prefer), toss the cooked veggies with the remaining butter/lemon juice mixture from the dish/tray you baked the salmon in. It lends wonderful flavor to veggies. No surprise there though --- it's butter!
Obviously my verdict is wonderfully delish. I know I should eat more fish, but it's hard with a freezer full of meat. That, and fish around here isn't exactly cheap. Well, catfish and tilapia can be found on sale for $2.99/lb. sometimes, but I prefer salmon and cod, both of which are much more pricey. I did find cod on sale this week though, so I'll be picking some of that up. I almost think I'd be willing to try this recipe with tilapia; the butter/lemon/dill combo was so wonderful, I think it might perk up just about any fish. Except maybe catfish, 'cause that just tastes like dirt to me.
Try this out with your favorite fish; I promise it won't disappoint in either taste or ease of preparation. Enjoy! Now . . . off for a walk on this beautiful Friday. Happy weekend everyone!
*Linked to Life as Mom’s Ultimate Recipe Swap for Thursday, 4/7/11. Her topic? Easy recipes.
*Linked to Miz Helen’s Country Cottage for Full Plate Thursday, 2/17/11.

Adapted from allrecipes.com
2 (4 oz.) salmon filets
3 Tbsp. butter, melted
2 1/2 Tbsp. lemon juice (yes, bottled is fine)
1 tsp. dried dill weed
1/8 tsp. garlic powder
Salt and pepper, to taste
Roasted veggies (optional side dish)
Preheat oven (or the toaster oven, which is what I used) to 350F. Wash salmon and pat dry. Stir melted butter, lemon juice, dill weed, garlic powder, salt and pepper together. Place salmon on baking tray (or in a baking dish if going into a normal oven) and pour the butter mixture over the filets. Cover the tray/dish with foil and bake for 20 minutes, or until fish flakes easily with a fork. Move salmon to plates or a serving platter.
If serving with roasted veggies as we did (or steamed or grilled, if you prefer), toss the cooked veggies with the remaining butter/lemon juice mixture from the dish/tray you baked the salmon in. It lends wonderful flavor to veggies. No surprise there though --- it's butter!
Obviously my verdict is wonderfully delish. I know I should eat more fish, but it's hard with a freezer full of meat. That, and fish around here isn't exactly cheap. Well, catfish and tilapia can be found on sale for $2.99/lb. sometimes, but I prefer salmon and cod, both of which are much more pricey. I did find cod on sale this week though, so I'll be picking some of that up. I almost think I'd be willing to try this recipe with tilapia; the butter/lemon/dill combo was so wonderful, I think it might perk up just about any fish. Except maybe catfish, 'cause that just tastes like dirt to me.
Try this out with your favorite fish; I promise it won't disappoint in either taste or ease of preparation. Enjoy! Now . . . off for a walk on this beautiful Friday. Happy weekend everyone!
*Linked to Life as Mom’s Ultimate Recipe Swap for Thursday, 4/7/11. Her topic? Easy recipes.
*Linked to Miz Helen’s Country Cottage for Full Plate Thursday, 2/17/11.
Wednesday, February 2, 2011
Superbowl Roundup
Sunday is the Superbowl, and while I don't care much for football, I love making snacky foods and catching the commercials. Here's a list of things that would be great at any Superbowl party. Hope you enjoy 1 or 2 . . . or 5 or 6!


Friday, January 21, 2011
Chorizo & Pasta
Chorizo. It's one of those things where, if you grew up on the good stuff they served in Southern Texas, all else seems to fall short later in life. I've tried several brands purchased in both Wisco and here in MD, and neither is what I'd call good. The most recent stuff was alright, but didn't add much to the dish other than heat. No real flavor whatsoever. Yes, I know what chorizo is made of and no, I don't want to actually taste that flavor, but please man, throw some spices in there! Don't be afraid. On the plus side, it wasn't as bad as some stuff I've had in the past. One in particular tasted like straight chili powder. Blecky.
 Since I've had some chorizo in in the freezer for several months, I gave good ol' BC a try and put it to use in a chorizo and pasta recipe.
Chorizo and Pasta
Adapted from Betty Crocker
15 oz. chorizo, casing removed
1/2 large onion, chopped
1 can (14.5 oz.) diced Italian tomatoes, undrained
2 tsp. chicken bouillon
2 c. water
4 c. classic egg noodles
In a large non-stick skillet, cook chorizo and onion over medium-high heat for approximately 8 minutes, stirring often, until chorizo is cooked and the onion is tender. Yes, I know it's hard to tell when chorizo is cooked because it doesn't really change color at all. Pay more attention to the onion if that's the case.
Add the remaining ingredients and stir to combine. Heat to boiling, then reduce heat to medium. Cover and cook approximately 10 minutes, stirring occassionally, until the noodles are tender. If the consistency is too thin, continue to cook a few more minutes without the lid to reduce the sauce. Then: eat!
 Verdict: This was alright, but next time I'll probably use a different meat. As I said earlier, chorizo up North just isn't really worth eating (in my opinion, that is). I also think the addition of some other veggies (corn, black beans, wilted spinach, etc.) would probably make tasty, healthy additions. It reheats well, just to let you know, as I had some for lunch today and it was still good. Enjoy!

Chorizo and Pasta
Adapted from Betty Crocker
15 oz. chorizo, casing removed
1/2 large onion, chopped
1 can (14.5 oz.) diced Italian tomatoes, undrained
2 tsp. chicken bouillon
2 c. water
4 c. classic egg noodles
In a large non-stick skillet, cook chorizo and onion over medium-high heat for approximately 8 minutes, stirring often, until chorizo is cooked and the onion is tender. Yes, I know it's hard to tell when chorizo is cooked because it doesn't really change color at all. Pay more attention to the onion if that's the case.
Add the remaining ingredients and stir to combine. Heat to boiling, then reduce heat to medium. Cover and cook approximately 10 minutes, stirring occassionally, until the noodles are tender. If the consistency is too thin, continue to cook a few more minutes without the lid to reduce the sauce. Then: eat!

Monday, December 20, 2010
BBQ Pork
Paula Deen isn't someone I often go to for recipes. Sure, the stuff she makes looks good, but I can't justify making something that has 800+ calories per bite. Perhaps that's a bit of an exaggeration, but we all know it's not too far-fetched. Every now and then though, she knocks one out of the park in a not-full-fatty kind of way. Don't get me wrong, pork roast isn't exactly super lean, but I skimmed the fat off the liquid and pulled all the fat off the meat that I could after it finished cooking. Anywho, that brings me to this --- her BBQ pork sandwiches. I was on the bike the other day, watching some good ol' Food Network while workin' out, and the episode featuring this recipe was on. I know how much Buppy likes pulled pork/chicken/ . . . most things pulled, and I knew we had almost all the ingredients on hand. Sweet! It's a little bit of work to make because the dry-rubbing process is a lil' messy, but it's well worth the effort! BBQ Pork
Source: Adapted from Paula Deen
2 Tbsp. salt
2 Tbsp. black pepper
2 Tbsp. brown sugar
2 Tbsp. paprika
1 tsp. cayenne
4 lb. shoulder pork roast
2 c. apple juice
1/2 c. apple cider vinegar
1/2 c. white vinegar
1/2 Tbsp. liquid smoke
1/2 Tbsp. garlic powder
Mix the dry rub ingredients in a small bowl. Sprinkle dry rub all over the pork roast, pressing into the pork. Cover with plastic wrap and refrigerate for at least 2 hours.
Preheat oven to 325F.
Combine liquid ingredients and the garlic powder in a medium bowl. Unwrap and place the pork into a large roasting pan and pour the liquid mixture over it. Wrap the roaster tightly with aluminum foil, then cover with the lid. Roast for 4 hours or until the meat shreds easily with forks. Baste with cooking liquid several times during the cooking process.
Remove from the pan and let cool slightly until it can be handled. Shred by hand or with forks into bite-sized pieces, then return to the cooking liquid. Serve on buns or over my homemade bread.
I can tell you that my recipe is a little different from Paula Deen's only because I didn't have exactly what her recipe calls for. Following her recipe exactly could only make things even better, which would be hard to do. I didn't have Worcestershire sauce (what!??!), which hers calls for. That would only be a stellar ingredient to add. I also didn't have enough apple cider vinegar to make the full 1 cup as hers calls for, so I subbed in 1/2 c. of the white vinegar. Using all apple cider vinegar could only make this more delish. Oh yeah, my cayenne addition was much less only because I used up what I had on hand. Check out her recipe, follow it, and use mine if you don't have everything on hand. I love that this was still fantastic even though I didn't have everything. Thank you Paula Deen ---- this bad boy is a keeper for sure! Enjoy! Sorry --- pic is super messy, but it was tasty nonetheless!
 BBQ Pork
Source: Adapted from Paula Deen
2 Tbsp. salt
2 Tbsp. black pepper
2 Tbsp. brown sugar
2 Tbsp. paprika
1 tsp. cayenne
4 lb. shoulder pork roast
2 c. apple juice
1/2 c. apple cider vinegar
1/2 c. white vinegar
1/2 Tbsp. liquid smoke
1/2 Tbsp. garlic powder
Mix the dry rub ingredients in a small bowl. Sprinkle dry rub all over the pork roast, pressing into the pork. Cover with plastic wrap and refrigerate for at least 2 hours.
Preheat oven to 325F.
Combine liquid ingredients and the garlic powder in a medium bowl. Unwrap and place the pork into a large roasting pan and pour the liquid mixture over it. Wrap the roaster tightly with aluminum foil, then cover with the lid. Roast for 4 hours or until the meat shreds easily with forks. Baste with cooking liquid several times during the cooking process.
Remove from the pan and let cool slightly until it can be handled. Shred by hand or with forks into bite-sized pieces, then return to the cooking liquid. Serve on buns or over my homemade bread.
I can tell you that my recipe is a little different from Paula Deen's only because I didn't have exactly what her recipe calls for. Following her recipe exactly could only make things even better, which would be hard to do. I didn't have Worcestershire sauce (what!??!), which hers calls for. That would only be a stellar ingredient to add. I also didn't have enough apple cider vinegar to make the full 1 cup as hers calls for, so I subbed in 1/2 c. of the white vinegar. Using all apple cider vinegar could only make this more delish. Oh yeah, my cayenne addition was much less only because I used up what I had on hand. Check out her recipe, follow it, and use mine if you don't have everything on hand. I love that this was still fantastic even though I didn't have everything. Thank you Paula Deen ---- this bad boy is a keeper for sure! Enjoy!
 Sorry --- pic is super messy, but it was tasty nonetheless!
Thursday, November 18, 2010
Three Cheese Fondue
 Ah, my 2nd attempt at cheese fondue. I'm pretty much ready to bath myself in this stuff.
I found a recipe on the 'net, but decided to change things up a bit when I saw the price of Emmentaler that day at the grocery store. What fun is life if you can't make up your own fondue rules, right? Right. So instead of Emmentaler, I used Gouda. While not the easiest cheese to shred, it made the fondue so rich and creamy. This is definitely a keeper.
Three Cheese FondueAdapted from AhLimP's submission on allrecipes.com
1 c. white wine
1 Tbsp. butter
1 Tbsp. all purpose flour
1 tsp. minced garlic
7(+/-) oz. Gruyere, shredded
7(+/-) oz. extra sharp white cheddar, shredded
7(+/-) oz. gouda, shredded (or chopped as gouda is hard to shred)
Melt the butter on low heat in the fondue pot. Stir in the flour to make a roux. Cook 1 minute, give or take, so the flour taste cooks out. Note: my heat was a little too high at first, so I added the wine after about 30 seconds so the roux wouldn't burn. Add the wine and garlic to the mixture and stir well. Add the cheeses, a handful at a time, and continue to stir to melt everything. Once it's all melted and creamy, start dippin'!
Our favorite dippers include soft pretzels, rye bagels (toasted), blanched cauliflower & broccoli, roasted pearl onions, asparagus, potatoes & cremini mushrooms, and steak.
 All gone!
I'm linking this post up to this week's Ultimate Recipe Swap over at Life as Mom. Her topic this week is New Year's foods, and while we're having steak this year (a gift from Buppy's dad that we received earlier this week), fondue at home would make a perfect, decadent & delicious meal for New Year's. Something to plan for next year for moi. Enjoy!
Sunday, November 14, 2010
Chicken-Fried Steak & Gravy
I haven't tried a lot of recipes from Eating Well’s website, but I can vouch for the tastiness of their chicken-fried steak and gravy. We've had cube steak in the freezer since we received our quarter cow last Fall, and it's not a piece o' meat I'm very familiar with cooking. I stumbled upon this recipe and decided I would finally bust out a package from the freezer. My only complaint is that the breading didn't want to stick to the meat as well as I'd hoped, but from what I hear, that's a common problem. Not sure how to remedy this for next time, but I'm happy there'll be a 'next time' for this! Buppy was a big fan, too. Chicken-Fried Steak & Gravy
Adapted from Eating Well
1/2 c. all purpose flour, divided
1 large egg, beaten
1/4 c. cornmeal
1/4 c. + 1 Tbsp. cornstarch, divided
1 tsp. paprika
1 lb. cube steak (approximately, I didn't weigh mine but I think that's what they were packaged as; mine was cut into 5 portions)
Salt & pepper, to taste
2 Tbsp. canola oil, divided
14 oz. beef broth (which I made from warm water & beef bouillion granules per package instructions)
1 1/2 Tbsp. water, divided
1/4 c. fat-free half & half
Warm mashed potatoes
Preheat oven to 350F. Coat a baking sheet with cooking spray.
Place 1/4 c. all purpose flour onto a large place. In a shallow dish or bowl, beat egg with 1/2 Tbps. water. In a separate bowl, stir together remaining 1/4 c. flour, cornmeal, 1/4 c. cornstarch & paprika. Season both sides of steak with salt & pepper. Dredge the steak in the flour, then dip into the egg mixture, then coat with the cornmeal mixture; be sure to shake off excess.
Heat 1 Tbsp. oil in a large nonstick skillet over medium-high heat. Add 2-3 pieces of steak to the pan and reduce heat to medium. Cook the steaks until brown on both sides, turning once, approximately 5 minutes total. Remove steaks from pan and place on the prepared baking sheet. Repeat with remaining oil and steaks. Once all steaks have been pan-fried, bake for approximately 10 minutes to finish cooking. While they're baking, pour broth into the same pan the steaks were fried in. Boil over medium heat, stirring occassionally, until it reduces to approximately 1 cup (3-5 minutes). Combine 1 Tbsp. cold water with 1 Tbsp. cornstarch until smooth. Remove pan from heat and stir in the cornstarch mixture. Return the pan to the heat and cook for 1-2 minutes or until the mixture thickens, stirring occassionally. Stir in the half & half, taste the sauce and season accordingly with salt and pepper. Serve the steaks on top of warm mashed potatoes and top with gravy. Enjoy!
 Chicken-Fried Steak & Gravy
Adapted from Eating Well
1/2 c. all purpose flour, divided
1 large egg, beaten
1/4 c. cornmeal
1/4 c. + 1 Tbsp. cornstarch, divided
1 tsp. paprika
1 lb. cube steak (approximately, I didn't weigh mine but I think that's what they were packaged as; mine was cut into 5 portions)
Salt & pepper, to taste
2 Tbsp. canola oil, divided
14 oz. beef broth (which I made from warm water & beef bouillion granules per package instructions)
1 1/2 Tbsp. water, divided
1/4 c. fat-free half & half
Warm mashed potatoes
Preheat oven to 350F. Coat a baking sheet with cooking spray.
Place 1/4 c. all purpose flour onto a large place. In a shallow dish or bowl, beat egg with 1/2 Tbps. water. In a separate bowl, stir together remaining 1/4 c. flour, cornmeal, 1/4 c. cornstarch & paprika. Season both sides of steak with salt & pepper. Dredge the steak in the flour, then dip into the egg mixture, then coat with the cornmeal mixture; be sure to shake off excess.
Heat 1 Tbsp. oil in a large nonstick skillet over medium-high heat. Add 2-3 pieces of steak to the pan and reduce heat to medium. Cook the steaks until brown on both sides, turning once, approximately 5 minutes total. Remove steaks from pan and place on the prepared baking sheet. Repeat with remaining oil and steaks. Once all steaks have been pan-fried, bake for approximately 10 minutes to finish cooking.
 While they're baking, pour broth into the same pan the steaks were fried in. Boil over medium heat, stirring occassionally, until it reduces to approximately 1 cup (3-5 minutes). Combine 1 Tbsp. cold water with 1 Tbsp. cornstarch until smooth. Remove pan from heat and stir in the cornstarch mixture. Return the pan to the heat and cook for 1-2 minutes or until the mixture thickens, stirring occassionally. Stir in the half & half, taste the sauce and season accordingly with salt and pepper. Serve the steaks on top of warm mashed potatoes and top with gravy. Enjoy!
Tuesday, November 9, 2010
Menu Plan Monday - Nov. 8, 2010
I know it's already Tuesday and I'm just now posting our week's menu plan, but better late than never, right? Besides, then I can refer back to this post instead of my ugly scratched up list when I totally forget what I'm supposed to be making. Good times.
Monday: Garden salads (lettuce, tomato, cremini mushrooms, celery, scallions & shredded cheddar cheese) topped with blackened chicken
Tuesday: Chicken-fried steak & gravy
Wednesday: A spin on grilled ham & cheese pull-apart sandwich loaf. If the turkey in the fridge is still good, we plan to use that instead of ham. Also, I have to see what type of cheese I have in the fridge; I think we have several, so I might mix 2 together. And since it's just the 2 of us eating, I might use buns instead of a whole loaf of bread. No need to waste food, right? Lastly, I keep seeing this butter/worcestershire mix that other foodies are brushing on top of sammys before warming in the oven. I might try to find that recipe and brush it on our sammys, too. Who knows where this dinner will eventually end up!
Thursday: I'm usually by myself because Thursdays are Buppy's overnight, but I think my sister is coming into town on Thursday (to stay for the weekend, yay!), so I think I'll try Alfredo pizza. My sister loves Alfredo sauce, and since the pizza has lots of spinach on it, I'm not sure how Buppy will like it. If it's good, I can always make some for him another night.
Friday: Onion beef stroganoff
Saturday: We'll be at a friend's surprise birthday party, to which we're bringing a hot pizza dip (unless I change my mind before then). My sister will be at a show she came to town to see, so no need to worry about her either. I'm sure lunch will be sandwiches and/or leftovers.
Sunday: This is my free day. By the time it rolls around, I hope to have something in mind. As of right now, I'm completely blank. I guess we'll see if my sister has any ideas for something she'd like me to make. We'll see.
Monday: Garden salads (lettuce, tomato, cremini mushrooms, celery, scallions & shredded cheddar cheese) topped with blackened chicken
Tuesday: Chicken-fried steak & gravy
Wednesday: A spin on grilled ham & cheese pull-apart sandwich loaf. If the turkey in the fridge is still good, we plan to use that instead of ham. Also, I have to see what type of cheese I have in the fridge; I think we have several, so I might mix 2 together. And since it's just the 2 of us eating, I might use buns instead of a whole loaf of bread. No need to waste food, right? Lastly, I keep seeing this butter/worcestershire mix that other foodies are brushing on top of sammys before warming in the oven. I might try to find that recipe and brush it on our sammys, too. Who knows where this dinner will eventually end up!
Thursday: I'm usually by myself because Thursdays are Buppy's overnight, but I think my sister is coming into town on Thursday (to stay for the weekend, yay!), so I think I'll try Alfredo pizza. My sister loves Alfredo sauce, and since the pizza has lots of spinach on it, I'm not sure how Buppy will like it. If it's good, I can always make some for him another night.
Friday: Onion beef stroganoff
Saturday: We'll be at a friend's surprise birthday party, to which we're bringing a hot pizza dip (unless I change my mind before then). My sister will be at a show she came to town to see, so no need to worry about her either. I'm sure lunch will be sandwiches and/or leftovers.
Sunday: This is my free day. By the time it rolls around, I hope to have something in mind. As of right now, I'm completely blank. I guess we'll see if my sister has any ideas for something she'd like me to make. We'll see.

Subscribe to:
Posts (Atom)