Showing posts with label dessert. Show all posts

Tuesday, January 17, 2012

A Simple Dessert Idea

I'm not going down in any history books for point out this simple dessert idea, but hey, I hadn't thought of it until last Fall, so why not throw it out there for anyone who hasn't thought of it yet either, right? Wow. That was a long sentence. 

Tiny Tot #1's birthday was in November, and Buppy's family came up from Virginia to celebrate with us. I made tacos, and for dessert, Tiny Tot said he wanted a chocolate cake with white frosting. Easy enough, right?

My plan was to make the cake and frosting from scratch, but I fell through some kind of wicked time warp. All of a sudden it was the night before the party and I hadn't baked. Well, box cake it is! And frosting? Light whipped topping, of course! My mother would not be proud. She always made the best cakes, cutting them into shapes for us. They were from scratch, and so was the frosting. Love you mom! Oh well. You do the best you can, right? Right.

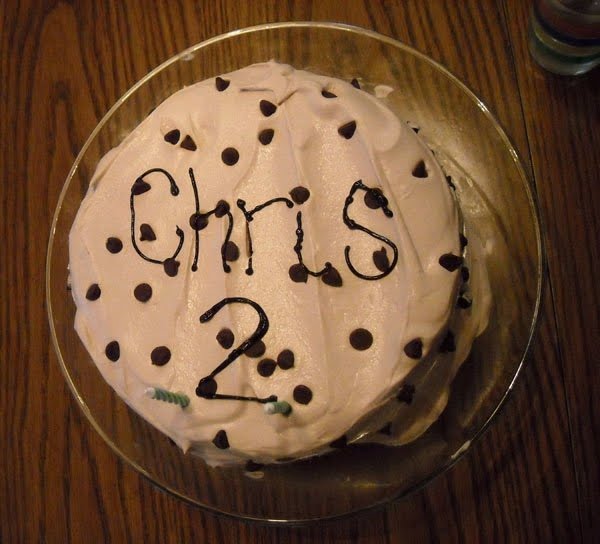
Now keep in mind that I'm by no means crafty. Or creative. Or artistic. I can't cut a cake into shapes, and I can't frost things to make them look like something specific. Me? I spread frosting on a cake, all in one layer, and then I jab in some candles. This time, however, Buppy and I had an idea. Why not crush up a candy bar or 2 from the pantry and sprinkle it over the whipped topping? I didn't have to "decorate" a cake, but it still looked fancier than the plain white top. Score!

I roughly chopped a full-sized Butterfinger and sprinkled it on top. Turns out Butterfinger just happens to be his entire family's favorite candy bar. Yup, score again. While I didn't taste the cake at all - I don't have much of a sweet tooth - everyone else seemed super satisfied with my efforts.

Next time you're running out of time and don't know how to jazz up a dessert, just take a look around for a random candy bar or 2 and chop 'em up. I don't see why most varieties wouldn't work. Then nom-nom-nom on your fancy dessert. Enjoy!

Tuesday, October 18, 2011

Chocolate Truffle Pie

One of my coworkers celebrated her birthday last week and me, being the homemaker I am, volunteered something sweet for the occasion. The original plan was a chocolate-vanilla swirled cheesecake, but after hitting up the gym that night, I knew there was no way this girl was gonna whip up a cheesecake and stay awake the 70+ minutes it was supposed to take to bake. Nu-uh. Good call on my part. I know myself so well.

What came about instead was a chocolate truffle pie, recipe courtesy of the same mag the cheesecake was featured in. I think I should have served room temperature instead of chilled, but there were still zero complaints!

Chocolate Truffle Pie
Kraft Magazine Holiday 2007, pg. 25

1 1/4 pkg. (10 squares) Baker's semi-sweet baking chocolate
1/2 c. whipping cream
4 eggs
1/2 c. sugar
1/4 c. flour
Whipped topping, optional, for garnish

Preheat oven to 325F. Place chocolate in a large microwaveable bowl and add whipping cream. Microwave on high for 2 minutes or until chocolate is mostly melted. Stir until the chocolate completely melts and cool slightly. 

Add eggs, sugar and flour; beat with a wire whisk until well blended. Pour into a 9" pie plate that's been coated with cooking spray. 

Bake 35 minutes or until outer half of pie is puffed but center is still slightly soft; cool. Garnish with whipped cream, if desired, and serve. Makes 10 servings.

I received compliments on this from all coworkers who tried it; poor Buppy didn't get any. Pretty sure he would have loved it. Oh well, there's always next time hun! Enjoy!

Sunday, January 30, 2011

Creamy Rice Pudding

Rice pudding is, I'm pretty sure, something I haven't had since my Grandma made it when I was a little girl. We're talking 20 years ago or so. Hers was so tasty and creamy, but to be honest, I don't think I've ever eaten the stuff anywhere but her kitchen. I'm leery of puddings in general: rice, bread, chocolate. Come to think of it, my Grandma's bread pudding was, as I remember, the only thing she made that I didn't like. Not even sure why. But I digress.

On a week night last week, around 8pm, I was reading a book I'd picked up from the library about food; I can't remember the exact title right now. I was in the pizza chapter, and the author mentioned that his wife had walked down the road after their pizza lunch to grab some rice pudding for dessert. So while it was 8pm on a Tuesday or Wednesday night, I decided I simply had to make bread pudding, stat. Yeah, I'm just spontaneous like that.

Creamy Rice Pudding
Slightly adapted from allrecipes.com

3/4 c. uncooked white rice
2 c. 2% milk, divided
1/3 c. white sugar
1/4 tsp. salt
1 egg, beaten
2/3 c. raisins
1 Tbsp. butter
1/2 tsp. vanilla-nut-butter extract
Cinnamon and sugar, for optional garnishes

In a medium saucepan, bring 1 1/2 c. water to a boil. Add rice and stir. Reduce heat and simmer, covered, for 20 minutes.

In another saucepan, combine the cooked rice, 1 1/2 c. milk, sugar, salt and raisins. Cook over medium heat until thick and creamy, approximately 15 minutes. Stir in the remaining 1/2 c. milk, beaten egg, butter and extract. Cook 1-2 more minutes, stirring constantly. Pour mixture into a container; sprinkle with cinnamon and sugar, to taste. Refrigerate several hours or overnight. Enjoy!

The verdict: either the original recipe or the reviews suggested that if a person wants a creamier, richer pudding, they should use short or medium grain rice. All I had in the house in my time of need was extra long grain, which proved to make a drier pudding than I'd hoped for. The extract I used (as opposed to plain vanilla) added a nice depth of flavor, and adding the raisins during the cooking process instead of at the end (as the original recipe suggested) made them nice and plump. Buppy said the pudding was much better after he stirred a small amount of milk into each serving. I'd like to try this recipe again, but with short grain rice next time.

Thursday, January 13, 2011

White Chip Island Cookies

My brother's birthday is today, and since he's such a great big brother, and since he asked so politely, I made him white chocolate chip and macadamia nut cookies. He's apparently a sucker for Subway's version. Funny story, the first grocery store I stopped at had 2 oz. packages of macadamia nuts for $3.50 or so. Second and third grocery stores didn't even carry 'em. Finally found 'em at Walmart (not a super center, so even though they had limited food in stock, they still luckily had the nuts), 6.5 oz. or so for $5.98. Not the cheapest nuts ever, but at that point I was just happy to have found any at all!

I checked the back of the bag of white chocolate chips, Nestle Toll House brand, and noticed that they had a recipe for White Chip Island Cookies. Since I'm not big into this type of cookie, I called my brother for advice. He'd said the cookies he likes are just like regular chocolate chip cookies, but with white chocolate chips and macadamia nuts instead. Toll House's version seemed similar to what I'd expect, but their "island" addition was coconut. My brother figured that since he likes everything else I make that has coconut in it, why not give it a try? So that's exactly what I did.

White Chip Island Cookies
Ever-so-slightly adapted from the recipe found on the Nestle Toll House bag of Premier White Morsels

1 2/3 c. all purpose flour
3/4 tsp. baking powder
1/2 tsp. baking soda
1/2 tsp. salt
3/4 c. (1 1/2 sticks) butter, softened
3/4 c. packed brown sugar
1/3 c. granulated sugar
1 tsp. vanilla-nut-butter extract
1 large egg
2 c. (12 oz. package) Nestle Toll House Premier White Morsels
1 c. flaked coconut
3/4 c. chopped macadamia nuts (or walnuts)

Preheat oven to 350F.

Combine flour, baking powder, baking soda and salt in a small bowl. Beat butter, sugars and extract in a separate (larger) bowl until creamy. Add the egg and beat until mixed. Beat the dry mixture into the wet mixture. Stir in morsels, coconut and nuts. Here's where it got tricky for me . . .

My 1st pan, after dropping scoops of dough onto it and baking per instructions, wouldn't level out. The original oven temp called for was 375F, but the outsides were almost burning and the cookies wouldn't flatten, so the insides were still too raw. I decided then to drop my oven temp to 350F. I also decided that, after all my cookies dough blobs were on the cookies sheet, I'd wet my hands, roll them around and flatten slightly for a more even bake. It worked, and my pans became more uniformly done with no burnt edges/raw insides.

I baked each pan for approximately 9 minutes, rotating the pans after 5 minutes.

I never thought of our oven as being hotter than normal, so the temp and time at which to bake your cookies will ultimately be up to you. Only you know your oven and it's quirks. I do advise somehow squishing the cookies slightly though so you don't end up with burnt edges.
I'm not sure I'd make this recipe again. The cookies taste good and I'm sure my brother will appreciate them, but . . . I'm just curious now if I'd have better luck and less hassle with a new recipe. We'll see. Anywho, happy birthday to my wonderful brother! Enjoy!

*This post is linked to Life as Mom’s Ultimate Recipe Swap (URS) for 3/3/11, Freezer Friendly Recipes. Check her blog out for more ideas!

Tuesday, January 11, 2011

Blueberry Muffins: Success!

I just got done baking a batch of blueberry muffins, and they look delish. I had too much dough for the 12 muffin cups in the pan, so I poured the rest into a small crock (like I'd use to heat up French Onion soup), cooked it in the toaster oven while the regular muffin pan was in the oven and viola! It's really tasty! I haven't popped the other 12 out of their pan since they're cooling now (no need to scorch my hands), but I'm excited for Buppy to try one when he gets home. They're oozing with blueberry goodness.
Blueberry Muffins
Slightly adapted from allrecipes.com

1/2 c. Imperial margarine
1 1/4 c. white sugar
1/2 tsp. salt
2 eggs
2 c. all purpose flour, divided
2 tsp. baking powder
1/2 c. buttermilk (I already had some on hand that needed to be used up, so it worked out well)
12 oz. fresh blueberries (I got a great deal at the produce market yesterday, yay!)
Extra white sugar

Line a 12-muffin pan with paper liners and preheat the oven to 375F.

In a large bowl, cream together the margarine, sugar and salt. Beat in the 2 eggs until well blended. Add 1 c. flour and baking powder to the mix; mix until just blended. Add 1/4 c. buttermilk; mix until just blended. Add 3/4 c. flour; mix until just blended. Add remaining 1/4 c. buttermilk; mix until just blended. (You get the idea here? We're just alternating the flour/baking powder mix with the buttermilk to ensure even mixing.) Crush 1/4 of the blueberries and mix into the dough. Mix the rest of the blueberries (rinsed) with the remaining 1/4 c. flour and fold into the batter. Scoop equal amounts of dough into each muffin liner. Once complete, sprinkle the tops of each muffin with a small amount of white sugar.

Bake in a preheated oven for 29+/- minutes, rotating the pan after 15 minutes. They should begin to turn golden brown, and the tops should spring back when lightly tapped.

Note: I had extra dough, as I said earlier, so instead of overfill each muffin cup (which couldn't have possbily held any more dough), I poured the remaining dough into a crock (think French Onion soup crock that is oven safe) and cooked it in the toaster oven for approximately 15 minutes or so at 350F. It was much flatter and so cooked much faster. If you don't have a toaster oven, feel free to bake it along with or after the original pan is finished cooking. Make sure to watch it so it doesn't burn, however.
These were relatively easy to make, are very pretty and the dough (and part of the lil' crock) taste great so far. All in all, I think I have a pretty good muffin recipe on my hands. Now I just can't wait to find raspberries on sales so I can sub them in. Enjoy!

*This is linked to Miz Helen’s Country Cottage Full Plate Thursdays for 2/24/11. Pop over for more great recipes!

Thursday, December 16, 2010

Raspberry Coconut Bars

I've had this recipe for so long it's embarrassing that I hadn't tried it until last week. We're talking early college days. I love raspberry anything (well, except fake raspberry liquor & candy, but it's a fine line), and who doesn't love coconut (besides Frankie)? I didn't write down where I found this when I jotted it down, but whoever came up with this was really on to something here!

Raspberry Coconut Bars
Source Unknown

1 2/3 c. graham cracker crumbs
1/2 c. butter, melted
2 2/3 c. flake coconut
1 c. raspberry preserves
1/3 c. chopped walnuts, toasted
1/2 c. semisweet chocolate chips
1/4 c. vanilla or white chocolate chips
1 can (14 oz.) sweetened condensed milk

Preheat oven to 350F. In a small bowl, combine graham cracker crumbs and butter; press into a 9"x13" baking pan that has been sprayed with cooking spray. Sprinkle with coconut, then drizzle with milk. Bake at 350F for 20-25 minutes or until lightly browned; cool completely. Spread preserves over crust and sprinkle with nuts. Melt chocolate chips (separately) and drizzle over nuts. Cut into bars; refrigerate until chocolate has set. Yield: approximately 3 dozen bars.
I made the mistake of cooling completely at the end prior to cutting into bars, so when I finally did cut them, the chocolate was obnoxious and cracked and got all jacked up. Oooops. These, like the praline crumb caramel cheesecake bars I made at the same time, did not want to release from the pan even though it had been sprayed with cooking spray. I'm thinking (because Buppy suggested it) this might be due to the fact that I used a generic cooking spray instead of Pam. Sometimes, you really get what you pay for, so next time I'll go with Pam and see if I have better luck with things releasing.

Overall, these were a huge hit at the holiday party I took them to. Everyone who tried them loved them and there were definitely "Oh! You have to try these!" comments thrown out. I'm taking the rest of them back to Wisconsin next week to share with my family for the holidays. Pretty sure they're gonna love 'em too. Enjoy!
*This post is linked to Miz Helen's Country Cottage Full Plate Thursday for 11/10/11. Check out her site for more amazing dishes.

Monday, November 15, 2010

Gluten Free Peanut Butter Truffle Brownies

When I call these little square of goodness sweet, it's the understatement of the year. It's like saying bacon is good. Words just can't describe, which is why I was only able to eat 1 bite per day for 4 days to finish off a small square. Buppy, along with the birthday girl and her husband, didn't have that problem. I'm guessing it's because I don't eat sweets very often, so when I do, they tend to overwhelm me.

A good friend of ours requires a gluten free diet, and since her birthday was a few weeks ago, I figured I could find a gluten free dessert recipe to make for her. Unfortunately most required me to purchase several different types of flour (nothing I keep on hand would work) . . . and I got lazy. Work was busy, we had several social outings planned, etc. I cheated.
Betty Crocker to the rescue! At one point when I searched for gluten free recipes, her wonderful page popped up, and it turns out that they now make box mixes for both gluten free brownies and cookies. Sweet! They also had some recipe ideas to jazz up said box products, so I followed one of those using what I had on hand. Easy, tasty and very, very appreciated!

The original recipe can be found
here, and since the only thing I changed was using butterscotch chips in place of chocolate (for the topping), I'll let you check out their site for details. I'll say this: next time, I would use chocolate chips, not butterscotch. While they were all I had on hand (which is why I subbed them), the butterscotch overwhelmed the brownie and the peanut butter. Not that they weren't still good, I just missed being able to taste the peanut butter filling. Also, I baked the brownies on the short side of the cooking window, and they were very fudgy in the middle. That's how I eat mine, but not everyone feels the same way, so if you'd prefer them baked through, I suggest going with the higher end of the suggested baking timetable. Enjoy!

Wednesday, August 25, 2010

Chocolate Brittle Surprise

Since Christmas is just around the corner [hey, it is in my book because I’m that girl who listens to Christmas music in July!], I thought I’d post something that has worked out beautifully as part of gift baskets for friends and coworkers during the holiday season in past years. It’s really easy to make, although be careful not to burn yourself with the hot butter/sugar mixture, ‘cause that hurts in a major way [ah, the voice of experience]! And watch it closely --- it’ll burn before ya can yell “what the . . . ”!

I made a few pans of this last year and the year before, broke ‘em up, slid ‘em into cute little holiday food bags and called it a day. And trust me, it’s not like getting fruitcake. People actually enjoy this “surprise”! No, I have no idea why it’s called "surprise" either. Perhaps because it’s made with soda crackers and that’s somewhat surprising? Hmmmmm, wish I could remember where I found the recipe . . .

Chocolate Brittle Surprise

35 unsalted soda crackers
1 c. butter
1 c. packed brown sugar
2 c. semisweet chocolate chips
1 c. chopped pecans

Preheat oven to 350F. Cover a cookie sheet with foil and spray foil with nonstick spray. Place crackers on foil in 5x7 rows. Microwave butter on high for 2 minutes; add brown sugar, stir and microwave another 2 minutes, stirring every 30 seconds. Pour over crackers and bake 10-15 minutes, checking often starting around the 10-minute mark [to make sure the mixture does not burn]. Remove from the oven and sprinkle chips and nuts over hot crackers; spread after 2 minutes [chips should have melted]. Refrigerate 1 hour; break into pieces. This can be frozen, by the way.

See? Super duper easy! Easy as, well, chocolate brittle surprise! And I bet variations would be just as tasty as the original, like using white or butterscotch chips instead of semisweet. Don't they make peppermint ones around the holidays, too? Now I'm going to have to play around with this --- enjoy!
Update: This will be linked up to Life as Mom’s Ultimate Recipe Swap for today, Thursday, 12/2/10. It's for favorite cookie recipes today, and while I realize this isn't technically a cookie, it wouldn't be the holidays around here without some of this fabulous little dessert. Check out her site for more great holiday cookie ideas!

Thursday, July 15, 2010

Snicker's Salad

This salad is fantastic, period. My dad would eat all "10-12 servings" in one sitting if I'd let him. The ingredients are few and the prep is relatively easy --- 2 things that I love about it. It's a great summer dish for picnics, but I also make it around the holidays or for potlucks anytime of year at work [old job, not this one; we're not really a potluck crew at this job.] I just ran across it and am thinking about making this for the party on Saturday instead of the pistachio fruit salad. It still has fruit in it, so I think I'm good!

Snickers Salad

1 [5oz.] pkg. instant vanilla pudding mix
1 c. milk
1 [12 oz.] container Cool Whip, thawed
6 apples [peeled, cored and chopped]
6 [2.16 oz.] Snickers, chilled and chopped
¼ c. seedless grapes

Prepare the pudding using 1 c. milk and blend together with whipped topping. Add the apples, Snickers and grapes. Mix together and refrigerate until chilled. 10-12 servings.

See, how simple was that? And you could even serve this as dessert if you wanted to --- enjoy!


Update: I'm linking this to Life as Mom's Ultimate Recipe Swap for today, July 22, 2010. The topic is picnic recipes, and I can't think of anything better to bring along. Check out lifeasmom.com for more great picnic recipes!

Thursday, June 24, 2010

Leftover fondue + fresh strawberries = dessert!

Father's Day was a day of laziness, a movie & a nice dinner at home. We had some leftover chocolate fondue I'd made awhile back in the fridge that needed to be used up, and some fresh strawberries too. Hmmm, what could I possibly make with both? *think*think*think* And the winner is . . . chocolate covered strawberries! Who would have ever thought?

I didn't feel like dragging out the fondue pot [we had enough dirty dishes with the rest of the meal!], so I decided to be a renegade and simply heat the chocolate in the glass dish it was stored in. Viola! Instant [almost] success! It didn't take long to melt in the microwave at all, surprisingly.

I really liked the texture of the chocolate more than regular melted chocolate by itself [the fondue had other things added to it when originally made], which made it seem softer and less brittle and breakable. Smooth and creamy baby!

I topped 3 of the strawberries with sprinkles [Buppy believes that sprinkles = happiness] and 3 with leftover crushed Oreo cookies [because those need to be used up too!]. Then I dipped 3 small graham cracker squares in the chocolate to go along with the berries. Six strawberries total, meaning 2 for each of the kids and 2 for Buppy. If you haven't noticed by now, I'm not really into sweets [eating them, that is], so I passed.

I had an emergency phone call from a family member in the middle of dinner that lasted forever, but the kids and Buppy all said they liked my creations. Hopefully they weren't lying. Then again, who wouldn't love 'em? I still have more chocolate to use up, so now I'm on the hunt to figure out what else I want to dip. Banana? Eh, been there, done that. Kiwi? Melon? Fresh mint leaves? Hmmm, I'll work on that. In the mean time, here are what my berries looked like:

Wednesday, June 16, 2010

The Ultimate Indulgence

Tomorrow's theme at Life as Mom’s Ultimate Recipe Swap is birthday cakes, so I thought I'd finally post what I made for Tiny Tot #2's birthday in 2009.

The story begins with his favorite food at the time: cookies, chocolate chip specifically. My idea was to make a cake for him that appeared to be a cookie. I thought about a giant decorated cookie, but in the end went with the cake idea. So incredibly happy I did. And so was Buppy's family. I think that cake will live on in all our minds and taste buds until a.) we're old and can't remember anything anymore, or b.) I make another one. 'A' might be the more likely thing to happen, but you never know.The cake wasn't complicated by any means, although we did struggle with the frosting tinting until my sister saved the day. Here we go . . .

I purchased 2 boxes of Ghirardelli brownie mixes and baked according to package directions in round baking pans. Then I basically made a sandwich out of them with
Hoffman’s ice cream, which I've learned is some of the best ice cream I've ever had. Hoffman's is local, so don't get your hopes up, but still, any ice cream you choose to use [think peanut butter to go with the chocolate!] will be spectacular. The party was in late Feb., so I decided to use their peppermint. I kid you not, that stuff is amazing. Wonderful. Yummy. Delish. All their ice creams I've had thus far have been good, but their seasonal peppermint stick just rocks my socks. In a major, major way.Once I've got the sandwich made, I stick it back into the freezer to firm up. Hmmmm, now how to make it look like a chocolate chip cookie? I'd decided I wanted to use whipped topping as frosting, but how to tint it brown? I tried food coloring with very unsuccessful result. Buppy and I thought and thought and thought. And then we thought some more. Then I called my sister, who is an artist, among other things, and therefore much more creative than I am. Her response when I told her my conundrum? "Uh, so you don't want to use cocoa powder?" Sheer genius my girl! I knew I called her for a reason! Apparently she told the story to my dad, and even before she told him what her suggestion was, dad made the same comment: why don't they want to use cocoa powder? Because neither Buppy nor myself thought of it! How we didn't, I'll never know, but I'm happy someone could point me in the right direction. I did as suggested and used cocoa powder to tint the whipped topping a light brownish color, then sprinkled chocolate chips all over it.

This was honestly love at first bite. John's nieces asked me to make their next birthday cake. Everyone present loved this. The simplicity of it still baffles me, but I'll go with it. Brownies, local peppermint stick ice cream, whipped topping and chocolate chips. Sometimes I amaze myself. Please-please-please try this out if you haven't before. You won't regret it, promise! And if you'd like to see more birthday cake ideas, head on over to Life as Mom’s blog. Enjoy!

Oh yeah, and once upon a time, I made a train cake for Tiny Tot #1's 4th birthday. I was pretty proud of this one since it was my first-ever attempt at making a birthday cake!

Monday, May 24, 2010

Makeover Cherry Coconut Bars

I made Buppy take most of these bad boys to work with him this morning, and if it's any indication of how good they are, here's what one of his coworkers had to say about them: "I'm a grumpy old bastard and hate everything in the world except, apparently, Bugaboo's cherry coconut bars." Granted he didn't refer to me as Bugaboo, but everything else is verbatim. They were called "extraordinary." You should definitely try them on for size.

Makeover Cherry Coconut Bars
Taste of Home's Light & Tasty Annual Recipes 2005

Crust:
3/4 c. all-purpose flour
3 Tbsp. confectioners' sugar
3 Tbsp. cold butter
Filling:
1 egg
2 egg whites
1 c. sugar
1 tsp. vanilla extract
1/4 c. all-purpose flour
1/2 tsp. baking powder
1/4 tsp. salt
1/2 c. quartered maraschino cherries
1/3 c. chopped walnuts
1/3 c. flaked coconut

In a food processor, place flour and confectioners' sugar; cover and process until blended. Add butter; cover and pulse 15 times or until mixture resembles fine crumbs. Press into a 9-inch square baking pan coated with nonstick cooking spray. Bake at 350F for 12-15 minutes or until lightly browned. Cool on a wire rack.

For filling, combine the egg, egg whites, sugar and vanilla in a bowl. Combine the flour, baking powder and salt in a separate bowl; add the egg mixture. Stir in the cherries, nuts and coconut. Spread over crust. Bake for 20-25 minutes or until firm. Cool on a wire rack. Cut into bars. Refrigerate leftovers.

I actually had to use an 8"x 8" square baking dish because that was the closest I had to a 9" square one. They still turned out great. Buppy and I agreed that they're not as "cherry" as we'd anticipated, but they're still super yummy. And the fact that they're light & tasty ---- sweet!

Tuesday, April 27, 2010

Fresh Strawberry Pie

This is good. Like, real good. Messy, I'll admit, but worth it. Simple, too. Oh, and it's pretty!

Fresh Strawberry Pie
Adapted from Taste of Home's Light & Tasty Annual Recipes 2005
Judy Watson, Newmarket, Ontario

2 pints fresh strawberries
1 pastry shell [9 in.], baked
2/3 c. sugar
1/2 c. water
2 Tbsp. cornstarch
2 Tbsp. cold water
5-6 drops red food coloring, optional
Reduced-fat whipped topping

Set aside approximately 1 c. strawberries. Arrange remaining berries in pie shell. With a fork, mash reserved 1 c. strawberries; set aside.
In a saucepan, combine sugar and water; cook and stir until sugar is dissolved. Add mashed strawberries and bring to a boil. Combine cornstarch and cold water until smooth. Gradually stir into strawberry mixture. Bring to a boil; cook and stir for up to 2 minutes until thickened [mine thickened almost immediately, just FYI.] Stir in food coloring if desired. Cool for 15-20 minutes, stirring occasionally. Spoon over strawberries in crust. Refrigerate for at least 2 hours. Garnish with whipped topping. Yield: 8 servings.
The original recipe calls for 3 pints plus 1 c. of strawberries, but to be honest, I'm not sure what'd I'd have done with all the extra berries. I used the 2 pints I had on hand and that seemed like the perfect amount. I suppose I could have mashed up a few more for the cooked mixture, but I don't feel like I shorted myself at all using only 2 pints.

This pie definitely didn't hold it's shape when it was taken out of the pie plate, but that's not a huge thing for me. As long as it tastes good --- that's more what I'm all about. I'm sure I'll make this again during the summer months. Enjoy!

P.S. Today I discovered that Life as Mom's Ultimate Recipe Swap topic is summer recipes. This is really the epitome of summer for me as I used to picked fresh strawberries every year with my grandparents when I was young. That's how you knew summer was really here. For more great summer recipes, check out her site!

Monday, April 19, 2010

Fun-Do, Part Deux

A little over a week ago when we had friends over for our monthly dinner, they made the entire [super yummy!] meal with the exception of dessert. Dessert was mine to "bring." Bring is in quotes because I don't actually bring it to their house as it sounds; they made and brought dinner to us so we wouldn't have to get a sitter. This arrangement still allows for us to get together without the added cost for the night. Way cool of them to come to our house every month; we're stuck with dishes, but it's completely worth it! Back to dessert.

I wasn't sure what to make. I love baking and desserts in general, although I rarely eat more than a bite or two. I thought about something healthy, with fruit, but Buppy persuaded me to stick with my original idea --- chocolate fondue. This recipe came from the same tear out that featured the
classic cheese fondue we tried a few weeks back. Everyone seemed to enjoy it; I tried it with a pretzel or two and a strawberry. It was fun to sit around and chat while dipping!

Chocolate Fondue
[Grocery store magazine tear-out]

12 oz. dark chocolate – chips or roughly chopped
½ c. heavy cream, plus extra if fondue is too thick
1 Tbsp. Amaretto or other liqueur, optional
Dippers – strawberries, banana, marshmallows, pretzels, etc.

Bring cream to a light simmer over medium heat. Do not let it come to a boil. Add chocolate in small batches, stirring until melted before adding more. When all chocolate is incorporated, add liqueur of choice, if using. Others that would work well include Frangelico, Grand Marnier or brandy.

Be sure to use moderate heat and do not allow chocolate to boil – this type of fondue can burn easily. If fondue becomes too thick, add additional cream one tablespoon at a time, and mix to incorporate.

Server with your choice of dippers; we used the ones listed above.

I think Frangelico would be amazing with this, but we used triple sec as it's what I had on hand. I had Amaretto too, but Buppy was feeling shady about this one as it wasn't a really high quality one and he wasn't super keen on the taste. That, and he loves orange and chocolate together.

Enjoy!

Tuesday, March 23, 2010

Guinness Chocolate Cupcakes with Bailey's Cream Cheese Frosting

I've had this recipe saved for awhile now and finally decided to make it as it's a coworker's birthday tomorrow. What a great way to celebrate! Guinness, cupcakes, Bailey's --- oh my! I'm not sure where I found this recipe originally, but I know Nook & Pantry's blog has the exact same recipe on it. Maybe I was browsing there one day; whatever the case, here we are.

To be honest, I wasn't apparently all there last night when I made these. About 30 seconds after I stuck the first muffin tin of 12 into the oven, I had to snatch it back out. Hmmmm Bugaboo. The recipe mentions vanilla and eggs, neither of which I put in. I was so busy reading the direction part I failed to double-check that I actually added all ingredients. I actually had to scrape all the batter out of the cupcake liners, dump it back into the bowl, add my missing ingredients and then refill new liners. Can we say forgetful?

Once done, I think they turned out alright. I'm not a huge cupcake/cake/pie fan overall, but they were still good. What I did notice is that once they are iced with the Bailey's frosting, the Guinness flavor really doesn't come through much at all. Not that this is a bad thing though; the frosting was really good.

Chocolate Guinness Cupcakes
Found on
Nook & Pantry

2 c. unbleached all purpose flour
½ c. Dutch processed cocoa powder
¼ tsp. salt
1 ½ tsp. baking soda
1 c. granulated sugar
½ c. brown sugar (light or dark)
½ c. unsalted butter, softened
2 tsp. vanilla extract
2 eggs
½ c. sour cream
1 (12 oz.) bottle (1 ½ c.) Guinness or stout beer

Preheat the oven to 350F and butter or line with paper cups 2-12 count muffin tins.

In a large bowl briefly whisk together the flour, cocoa powder, baking soda, and salt.

In the bowl of a stand mixer with a paddle attachment or with a hand mixer, beat the butter, granulated sugar, and brown sugar until light and fluffy.

Add one egg and beat until evenly mixed and fluffy, making sure to scrape down the mixer bowl once in a while. Add the second egg and vanilla extract and beat again until light and fluffy. Add the sour cream and beat in, then with the mixer running, slowly pour in the Guinness.

Sift the dry ingredients into the batter and slowly stir the batter until it is evenly mixed and there are no streaks of flour. Make sure to stop the mixer frequently to scrape down the sides and make sure to mix up any flour pockets hidden on the bottom of the bowl.

Divide 1/4 c. of batter into each muffin cup; you’ll get about 20 – 24 cupcakes. Bake at 350F on the middle rack for 20 – 25 minutes. A toothpick inserted into the center of a cupcake in the middle of the pan should come out clean. Make sure to rotate the pans halfway through baking. Set on a rack to cool to room temperature before frosting.

Bailey's Cream Cheese Frosting
Found on
Nook & Pantry

1 (8 oz.) pkg. cream cheese, softened
½ c. unsalted butter, softened
2 c. confectioner’s sugar
4-6 Tbsp. Bailey’s Irish Cream


Beat everything but the Bailey’s in a mixing bowl until light and fluffy. Slowly drizzle in the Bailey’s, more or less depending on how boozey you want the frosting, and beat until completely incorporated into the frosting. Now go frost those cupcakes!

While I said that I'm not a huge cupcake person, they've been a huge success here at work so far today!

Enjoy!


*Pictures to come soon, once I upload them off my camera!

Friday, March 19, 2010

More Veggies in Cake! [Choco-Zucchini Cake]

I first tried this cake back in '03 or '04 while bartending at a supper club back in Wisco. One of our regulars brought it in for some reason and I immediately fell in love. While I don't dislike zucchini, I was definitely surprised to hear that the cake contained a fair amount of it. My immediate thought: sweet --- I'm gettin' a serving of veggies with my dessert!

I attempted to bring it as dessert the first time Buppy and I visited his family in VA [my first time meeting his brother and sister-in-law], and for some odd reason, the zucchini all sunk to the bottom. It hasn't happened any other time I've made it, so I'm calling it a fluke. FLUKE I tell you! I haven't made it again since then, but I still feel like it's a great recipe worth sharing, especially since you can slip some veggies in. If you make it and the zucchini sinks, please let me know. If you make it and it turns out awesome, go ahead and rub that in my face, too!

Choco-Zucchini Cake
RB passed the recipe on to me, but I have no idea where she found it

½ c. shortening
½ c. oil
1 ¾ c. sugar
2 eggs
2 tsp. vanilla
½ c. sour milk (add ½ Tbsp. vinegar to milk to make sour; be sure to let sit 5 minutes prior to adding to other ingredients)
2 ½ c. flour
4 Tbsp. cocoa
1 tsp. baking soda
½ tsp. cinnamon
1 tsp. salt
1 tsp. baking powder
2 c. zucchini, shredded
Chocolate chips and nuts for topping cake

Preheat oven to 350F; cream shortening, oil and sugar. Add eggs, vanilla and milk; blend. Stir in dry ingredients. Add grated zucchini. Pour into greased 9”x13” pan. Sprinkle top of cake with chocolate chips and nuts. Bake 40-45 minutes.

I have pictures, but they're just of the top and the lighting is bad, so I'll spare you. Enjoy!

Cream Cheese Frosting

Remember a week or 2 ago when I blogged about my awesome carrot cake recipe? Buppy pointed out at that time that, really, what the heck is carrot cake without homemade cream cheese frosting? He's so right. I hate when that happens.

Anyway, the 2 pair so well together, and they're a perfect dessert for this upcoming Easter holiday. Rabbits eat carrots, right? And the Easter Bunny is a rabbit, therefore he eats carrots and we should too. Like my reasoning? I'm so darn sneaky. Make the cake. Make the frosting. You can thank me later.

Cream Cheese Frosting
I dunno where this came from

2 c. powdered sugar
2 [8oz.] pkgs. cream cheese
½ c. butter
1 tsp. vanilla

Mix cream cheese and butter together until smooth. Add vanilla then gradually add powdered sugar. Mix until smooth and creamy.

Wow, how simple, right? Yeah, until it took me several bad recipes to actually find one that worked. Definitely a keeper here folks.

Since it makes a little too much for the cake [unless you like a lot of frosting, like my brother], use the extra to make graham cracker-frosting sandwiches for dessert sometime. They're super tasty, easy and fun! Enjoy!

Tuesday, March 9, 2010

Little Cookie Clouds

They look like little cookie clouds, especially when I add random food coloring to the batter, but everyone else you know probably calls them coconut macaroons. To that I say: boring! But whatever you wanna call 'em, I call my recipe darn yummy. And the best part? Super simple. Another bonus? I can tell you from experience that they keep [stay soft] for quite awhile and ship really well, too. Yes little cookies, you get an A++ from me!

Easy Coconut Macaroons
[Sorry, no idea where these bad boys came from!]

2 ½ c. flaked coconut
¾ c. flour
1/8 tsp. salt
1 (14 oz.) can sweetened condensed milk
[fat free works just as well as regular here]
1 ½ tsp. almond extract

Toss coconut, flour and salt together. Stir in sweetened condensed milk and extract. Drop by rounded teaspoonfuls 3 inches apart onto greased cookie sheets. Bake at 300F for 18-22 minutes. Makes 32 cookies.

Can't get much simpiler than this, and for anyone out there who loves coconut --- these are a must! And don'tcha just love how shiny they get?
Enjoy!

Monday, March 8, 2010

Super Tasty & Super Easy Truffles

While I love to cook and experiment in the kitchen, there's something to be said for delicious-yet-easy foods, especially desserts. This, my friends, is one of those little blessings. I first made them for Christmas 2007 and actually hadn't made them again until this past weekend; they were the featured [and only] dessert at my party. I'm much more of a salty than sweet person overall, so the appetizer selection was mainly savory foods instead of sweet. However, I knew I had to throw some type of dessert into the mix, and Buppy mentioned he hadn't had these in forever. Decision made. Thank goodness I never throw away my cooking magazines [no matter how many times I move!], so finding the recipe was relatively simple. Whew.Easy Oreo Truffles
Kraft food & family, Fall 2006, Joy Gulik, Bloomingdale, IL

1 pkg. [1 lb., 2 oz.] Oreo Chocolate Sandwich cookies, divided
1 pkg. [8 oz.] cream cheese, softened
2 pkg. [8 oz. each] Baker’s semi-sweet baking chocolate, melted [This time around, I only melted 1 1/2 pkgs. of the Baker's chocolate and I still had some leftover, so start there and if you need more, melt the remaining 1/2 pkg.]

Crush 9 of the cookies to fine crumbs in food processor; reserve for later use. Crush remaining 36 cookies to fine crumbs; place in a medium bowl. Add cream cheese; mix until well blended. Roll cookies mixture into 42 balls, about 1 inch in diameter.

Dip balls in chocolate; place on wax paper-covered baking sheet. [Any leftover chocolate can be stored at room temp. for later use.] Sprinkle with reserved cookie crumbs.

Refrigerate until firm, about 1 hour. Store leftover truffles, covered, in the refrigerator.

Makes 3 ½ dozen or 42 serving, 1 truffle each.

Tip: For easy dipping, place truffle ball in melted chocolate to coat; roll if necessary. Lift truffle from chocolate using 2 forks [this will allow excess chocolate to run off] before placing on wax paper.

Does it get much simpler than 3 ingredients and the use of a food processor for most of the work? No. But don't be fooled --- even though the recipe super simple, the taste and presentation are still extremely rewarding. Enjoy!


Update: I'm linking this post up to Life as Mom's Ultimate Recipe Swap for today, Thursday 4/1/10. The topic this week is desserts, so stop on over to check out more great recipes!